Each winter season, my fireplace produces a good amount of ashes in a metal container, which I normally just dispose of. One time when I was talking with my neighbor, she revealed to me that she had been using her homemade potassium fertilizer from the same type of waste material for many years. It was that conversation that led to my discovery of how to make DIY pot ash and actually it turns out to be easy. In this tutorial, you will learn about the right wood, safe leaching and reduction methods, and how much you should use once you produce your potash.
What You Need Before You Start
Before burning any item, collect the necessary materials. A couple of inexpensive containers and patience play a larger role than any special equipment. The bulk of the items you will need will most likely be found in your garage or kitchen cabinets.
Choosing the Right Wood and Ash
However, not all ashes are the same when it comes to this procedure. Oak, hickory, and beech burn hotter and have more potassium content than soft woods. However, you can make use of soft wood ashes too, although the yields will be slightly smaller. The aim is to have good burning that gives off very fine, light grey/white ash rather than the chunky black wood ashes. This will tell you that there are still dark wood ashes meaning that the combustion was incomplete and will not leach well. Do not use wood that has been painted, stained or pressure-treated as chemicals from these woods will contaminate the process.
Tools and Safety Gear
It is necessary to have a five-gallon bucket, a clean additional container, some fabric, and a pot that can be heated to boil in. You should drill some holes into the bottom of one bucket, with each hole being an eighth or a quarter inch in diameter, in order to let water seep out slowly. Do not forget to include gloves, protective eyewear, and closed toe shoes into your list. The solution will be quite corrosive, much like lye.
How to Make DIY Pot Ash at Home: Leaching and Reducing Wood Ash
This is the heart of the entire process, and it takes some waiting more than active effort. Once you understand the basic mechanics, repeating the process gets much faster each time.
Building a Simple Leaching Barrel
Lining the bucket that has been drilled with a piece of fabric, fill it about halfway with the ash you have accumulated. Add clean water to it very slowly, either rainwater or distilled water should be used, and continue adding until the bucket is almost filled. Gently stir, and you will see unburned particles floating to the top from which you can remove them. It should stand there and settle for at least an hour, although sometimes overnight is preferred.
Reducing the Liquid Into Potash
Pour the accumulated liquid, commonly referred to as lye water, in a heat-resistant container outside. Allow it to boil slowly and watch as the water boils off and the mixture becomes significantly thicker. Ultimately, there will remain a white powdery substance potassium carbonate which is popularly called potash. The whole procedure of learning how to make homemade pot ash can take a few hours through continuous boiling. You will get a rather low quantity in terms of output from the initial amount of ash used which is perfectly okay.
Safety Precautions When Working With Wood Ash Lye
Since the liquid that results from leaching is really caustic, the issue of safety needs to be given due consideration. Some simple practices can keep one safe from getting burned or irritated and contamination as well.
Handling Caustic Liquid Safely
Wear gloves and goggles at all times during leaching and boiling, not only during the most messy parts of the procedure. Perform the experiment either outdoors or in a well-ventilated area because boiling intensifies the smell as the liquid volume decreases. Have a bucket of clean water handy in case some liquid spills on your skin; if this occurs, rinse yourself off immediately.
What Not to Mix With Ash or Potash
Do not use wood ash or potash together with nitrogen fertilizer and urea. This mixture gives off ammonia gas that is bad and may pose danger. Avoid storing ashes where oily rags, fire or hot ashes exist since ashes even after cooling may contain heat inside. Always keep your work area clean and clearly mark any storage container you might be using.
Using Your Homemade Potash in the Garden
After you have produced finished potash or even plain wood ash, applying the same becomes equally important. The use of either helps in preserving the condition of your soil rather than disturbing it.
Testing Soil pH First
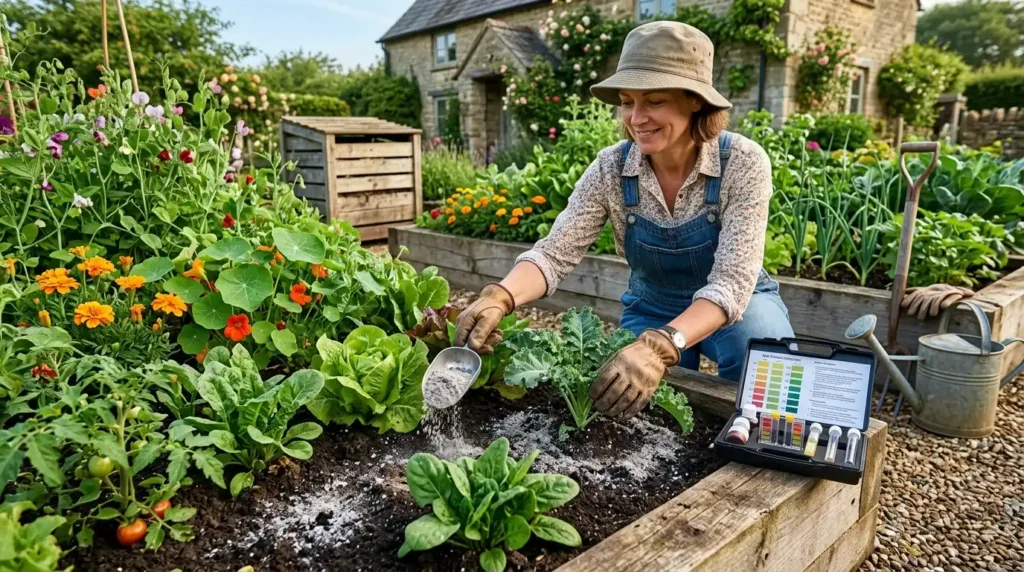
Both wood ash and potash will increase soil pH, serving as a liming agent. Be sure to check your soil first because ash might push neutral and alkaline soil too far upwards. Vegetables thrive at pH levels of about 6.2 to 6.8. If your soil is around that pH level, avoid ash and go for compost instead. In case of acidic soils, a little bit might do good.
Application Rates and Timing
Generally, extension guides will state that an application rate of about 15 to 20 pounds per 1,000 sq. ft. per year is a maximum for the use of raw wood ash. In case of shrubs and perennials, a good application would be one-half pound applied annually to the topsoil, worked in gently. This should be done in the early spring, prior to new growth.
Common Mistakes to Avoid
Even simple projects go sideways without a little forethought. These two mistakes come up constantly among first-time potash makers.
Overusing Ash on the Wrong Soil
Too much is not good; excess ash will exclude other nutrients and raise the pH too high. Your application must always be guided by soil test results. If the soil looks gray after treatment or the plants stop growing after, then it is too much.
Confusing Potash With Soap-Making Lye
Wood ash lye and commercial lye have their differences. Interchanging them while making soap may give you unpredictable and dangerous outcomes. If you’re bent on making soap, then better to just use industrial lye and only keep the homemade lye for gardening purposes.
Conclusion
Knowing how to make your own pot ash through DIY allows you to turn the fireplace waste product into an effective fertilizer that you can use in your garden. You have to be patient, cautious, and even go through some mistakes, but the effort will be worth it since you get to produce your own natural source of potassium. Just be sure to test the soil and use it sparingly.
Frequently Asked Questions (FAQs)
Settling takes several hours up to overnight and then boiling several hours. You need the whole afternoon for this process.
They are close in chemical composition (potassium carbonate), but in commercial fertilizers potassium carbonate is more concentrated and standardized. Your own production will depend on the type of wood you used.
Yes, you can apply wood ashes to your soil in small amounts directly without any preparation process leaching and boiling.
Boiling process must be done in well-ventilated area because fumes accumulate while liquid is boiling down. Do not leave the process unattended.
1 thought on “How to Make DIY Pot Ash at Home: A 5-Step Method for Turning Wood Ash Into Garden Fertilizer”